One such endgame scenario involves orchestrating a checkmate using a rook and a bishop, a situation that demands precision and understanding of the chessboard dynamics.
Mastering the rook and bishop checkmate involves strategic coordination and maneuvering of the pieces to corner the opposing king, utilizing techniques such as the W-method to avoid common pitfalls like stalemate and successfully deliver a checkmate.
We demonstrate examples below.
Below we look more into the strategies and techniques required to successfully execute a rook and bishop checkmate.
Understanding the Rook and Bishop Partnership
Unique Abilities of the Rook and Bishop
Before diving into the checkmate strategy, it is essential to understand the unique abilities of the rook and bishop.
The rook can move vertically or horizontally any number of squares, while the bishop can move diagonally across the board.
Utilizing these movements strategically can corner the opposing king and lead to a successful checkmate.
Importance of Coordination
Coordination between the rook and bishop is vital in executing a successful checkmate.
The two pieces should work in harmony, creating a net around the opposing king and gradually reducing its mobility until it has no legal moves left.
Setting up the Board for Checkmate
Centralizing Your Pieces
To initiate the checkmate, it is advisable to centralize your pieces, which allows them to control a larger portion of the board and restrict the movement of the opposing king.
Forcing the King to the Board’s Edge
The next step in the strategy is to force the opposing king towards the edge of the board.
This can be achieved by using the rook and bishop to create a barrier that limits the king’s options for movement.
Executing the Checkmate
The W-Method
The W-method is a well-known technique to execute a rook and bishop checkmate.
It involves maneuvering your pieces in a ‘W’ pattern to gradually corner the king and leave it with no escape routes.
Delivering the Final Blow
Once the king is cornered, it’s time to deliver the final blow.
This involves using the bishop to control squares that the rook cannot, effectively creating a mating net that leaves the king with no legal moves, thus achieving checkmate.
Example of Rook and Bishop Checkmate
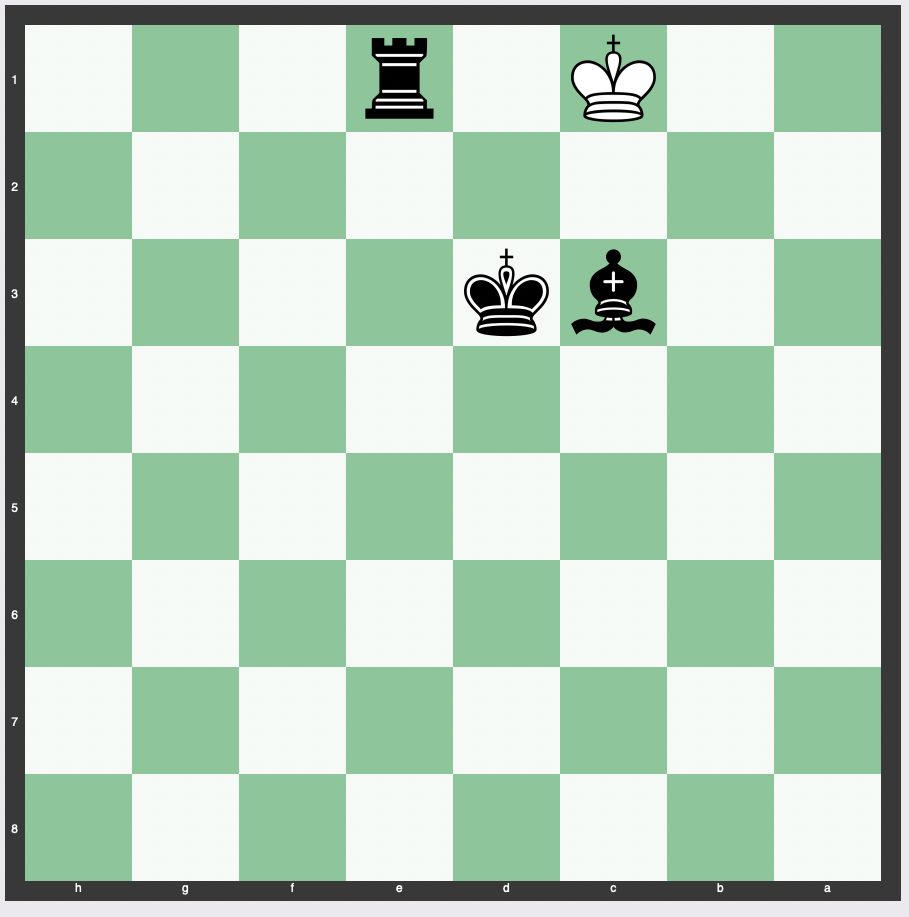
Take the following position:

The opponent’s king is to go after the rook, so let’s go to the opposite side.
Whenever the king goes back a rank (or file) we go down to create a barrier through which the king can’t escape.

We’re going to need our king, so bring our king down one square.

Now we bring our rook down, which will push the king to the edge of the board.

Bring our king down again.

Our king over.

Now our bishop in to cut off an escape square. (We can also execute the checkmate with just the rook and king.)

Then deliver the final blow for checkmate.

Other Examples of Bishop and Rook Checkmate
There are multiple patterns of this checkmate.
Example #1
Here are other versions, among many:

Example #2

Example #3

Example #4
There are also examples of this checkmate “in traffic.”
The simple geometry of the rook in the corner, the bishop over the king, and one gap between them will get the job done:

Example #4
It’s also possible in certain endgames when queens are off the board and the soon-to-be-checkmated king has limited room:

Common Mistakes in Rook & Bishop Checkmate and How to Avoid Them
Stalemate
One of the common mistakes while attempting a rook and bishop checkmate is reaching a stalemate, where the opposing king has no legal moves but is not in check.
To avoid this, always ensure that the king has at least one square to move to until the final stages of the checkmate.
Losing Coordination
Losing coordination between the rook and bishop can give the opposing king an opportunity to escape. To prevent this, always think a few moves ahead and maintain a tight net around the king.
Conclusion
Executing a rook and bishop checkmate is a complex but rewarding endeavor.
With practice and understanding of the strategies outlined in this article, you can master this technique and add a powerful weapon to your chess arsenal.
Related
- Queen and Pawn Checkmate
- Queen and King Checkmate
- Knight and Bishop Checkmate
- Knight and Pawn Checkmate
- Rook and King Checkmate
- Bishop and King vs. King
- Two Knights Checkmate
- Bishop and Pawn Checkmate
- Knight and Bishop Checkmate
- Queen and Bishop Checkmate
- Rook and Pawn Checkmate
- Queen vs. Rook Endgame
- Back-Rank Mate
- Smothered Mate (Philidor Mate)
- 2-Move Checkmate
- 3-Move Checkmate
- 4-Move Checkmate
- 5-Move Checkmate

